Friday, May 30, 2014

Which came first, the phoenix or the flame?

I am the Diva's weekly challenge #169 is to make your string out of circles. My ZIA is in my sketchbook again, and this design is roughly 6 inches square, er, I mean round!
Be sure to check back next week as I will have a very special card completed that combines Zentangle® and rubber stamping!

Friday, May 23, 2014

Liquid Sunshine

This week's entry for The Weekend in Black and White. Be sure to check out all the great photos.

Make it theirs

Sometimes it's all about the recipient. I don't tend to make many cards in advance. An event comes up and I make a card to meet the occasion, hopefully matching what the recipient would like. Maybe a color, a theme, something to make it theirs. This time for my 9 year old granddaughter who is into reading the Warrior Cats series. Cats...check. Interactive...check. Book-like...check. Tactile...check. A little bling, strike that, a lot of bling...check!

Sizzix dies used: Accordion Flip 3-D and Frame & Label Bracket designed by Karen Burniston. All stamp images by Inkadinkado (Happy Birthday and Gem Stone Cats). I used Momento, Distress and Adirondack inks.

Happy Birthday kiddo!!!

Saturday, May 17, 2014

Oh Well...Punzel!

Diva weekly challenge #167 is a DuoTangle: Well and Punzel. Good challenge for me as I've never given Punzel much of a chance before, it just wasn't working for me. Glad I gave it the extra effort as I really love this result today! This is on an approximately 7" x 10" sketchbook page. Follow this link to the Diva Challenge which also provides links to the tangle instructions. Follow this link for more information on Zentangle®!

Friday, May 16, 2014

Maester's Poppy

Check out The Weekend in Black and White.

Daisy in the sun

Here is my entry for this month's one layer simplicity challenge. I first saw the background technique explained in this great video. Since I tried it out I seem to be seeing the technique used everywhere. I can see why. It's fun and gorgeous. My version uses Brick Wall Pattern by Darice embossing folder with shaded lilac Ranger Distress Ink (yet it came out shades of blue) and lettuce Ranger Adirondack ink that I watered down with Lumin Arte shimmering mist in gold and an added spritz of water for good measure. I was able to get 3 different "prints" from the ink. I let it dry several hours before stamping with Penny Black's Blush with tuxedo black Momento ink by Tsukineko. Luckily I used a stamp positioner as it took 2 or 3 stamps to get it dark enough on the rough watercolor paper. The shadow, also using the stamp positioner using gray flannel Momento, came out darker than I had hoped. I had intended to add a greeting, but in the end I thought it better without it. I did feel the shadow grounded the flower, but then the shadow needed grounding along with the background!  So,  I decided to draw the border with a Sakura black micron pen. Oh and I should mention, that's one sheet of 4 1/4" x 11 Strathmore Imperial 140 # cold press water color paper, scored and folded in two.
I'm beginning to believe that the secret to a good "simple" card is to make it look simple. In truth, it's very difficult, for me at least, to get the design, color, image and placement, all to come out well on one layer. There's not much you can hide!

Friday, May 9, 2014

Scraps and ATCs

More treasures from my box of scraps, that magical pile from my box of things just waiting to happen! Like my inchie project, these all came to be from pieces of not quite good enough at the time, or maybe just not quite the right color, etc. Now look at them! It's about time I replenished my ATCs (artist trading cards). I only ever seem to have one or two at a time and of course I want to give away two or three so I never quite have enough. Plus, I need to stock up for my Zentangle® CZT seminar later this summer! I know I'll meet lots of people to trade with!
For me, what helped the most to turn the scraps into art is having a template "frame" so that I can see exactly where the ATC would look best from the scrap piece and then cut. Sometimes some additional drawing, stamping, or inking etc was needed to complete the card. Other times nothing else was needed.
Most of the images here are stamped, one photograph of my hand drawn mandala and of course tangles that I've drawn. Stamped images include Single Iris by Penny Black, Poetic Prints Pastel Petals by Hero Arts, Fresh Bloom by Stampendous, Hello, Doily by Stampin Up, Pink Gerbera Daisy and Upsy Daisy by Inkadinkado, and Columbines from Stampa Rosa.
And check out this little gem. My local zentangle instructor, BJ Thompson, suggested a photo cube to display my zentangle tiles. I was looking for one when I found this acrylic "Photo Pen Cup". The ATCs fit perfectly around the sides. There's not quite enough room inside for me to completely fill the space, but I can stack several diagonally. Still looking for the photo cube.
For The Diva Challenge this week, I'm not quite sure if it's a new tangle or a variation of Tink. But be sure to check out the other examples!

Friday, May 2, 2014

Faux leather journals

You know how you can be visiting a blog and see a link to something interesting, go to it.... and then you see a link to something else? I can waste a lot of time doing that, but sometimes it's well worth it. Only, how did I get here? I found a link to Jenna Wheatman's blog where she had been making faux leather. She linked to Sheena Douglass' YouTube tutorials. It's actually made out of cardstock, some glycerin, water, inks and sealer. Along the way you run it through your die cutting machine with an embossing folder.
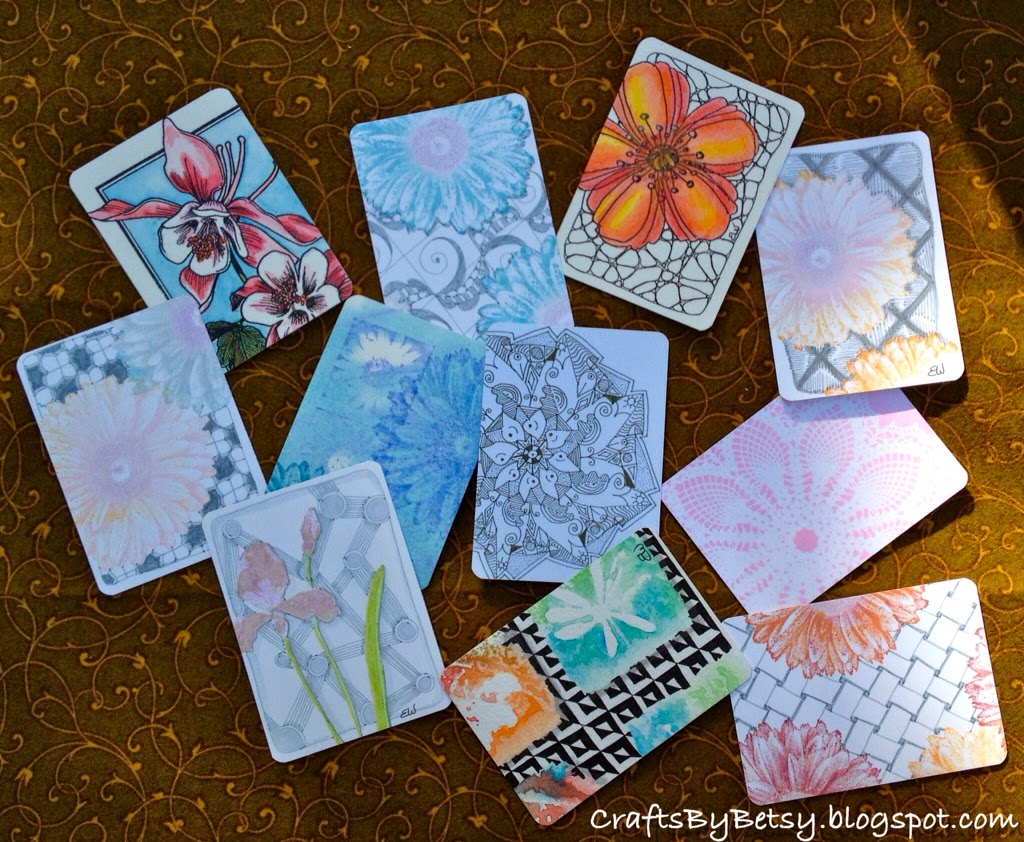
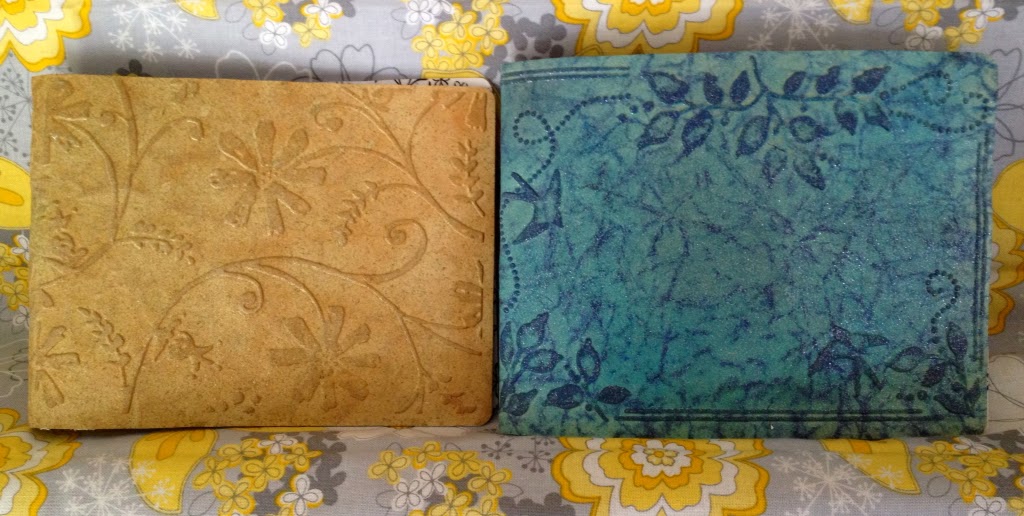
Of course, I needed to try it right away. The video warns you need good quality heavy craft cardstock. I had some craft card, but not very heavy, I'd guess about 50#. It's color was also a little on the light side, but hey, gotta try it right? I should have ordered some from Crafters Companion right then and there. After all, I still had to find the glycerin, but I thought that would be easy to get at the local grocery or pharmacy. Turns out I tried 5 different places before I found the glycerin at Bi-mart (a local, quirky, variety store).  I tried a few different sized embossing folders and likewise a few different sized journals. I used Darice scroll flourish corner, Cuttlebug stylized flowers and preserves - pears, and Sizzix pear and birds. In addition to Ranger Distress inks and Adirondacks, I also used a Copic air brush to add some more color. I tried some sealer with glitter in it and surprisingly liked the effect, so I also tried some Lumin Arte shimmering mist before a regular gloss sealer. I was really liking the look, but I still had the issue of the paper being fairly lightweight. Even though you glue cotton to it for the inside cover, I didn't think it would be strong enough. My husband suggested Tyvek, but that brought up another issue of adhesive. After some research online, I went with 3M Super 77 spray adhesive. I ended up with a 3 layer cover, Tyvek sandwiched in between the faux leather cardstock and the cotton fabric.
Next for the bookbinding. I initially followed Sheena's YouTube for that as well, however after 2 books I realized I preferred the knots to be inside and not outside, so I simply started my needle through the inside of the signature vs from the outside of the cover. When you watch the video it will make sense. I made four journals and still have two covers left to add signatures. I found some great YouTube book binding videos from Sea Lemon. I'm gonna have to try them out. No telling where that will lead me.  Oh, and next time, I'm going with the better quality, heavier card from Crafters Companion. I'm ordering some today. Not to worry about the other light weight craft card I already have, I used some of it for the signature pages and it looked great.